
Whati?
Roti is an Indian flat bread. Some might say the Indian flat bread. It is a great everyday bread which goes great with a curry or anything that you need to mop up. It can also be used to make wraps and goes great with spiced vegetables.
Whyti?
It's ridiculously easy to make and goes great with most things. It's very, very cheap too. I tend to make mine as and when but you can store it. It's as good hot as it is cold. And it's very easy to make. For yeastphobics like me it's perfect containing only flour and water.
Flour
Chapati flour for the purist but as I don't often have any of it on hand I've used other flours too. My Indian cook books recommend a half and half mix of wholemeal and plain. I've done that until I ran out of one or the other. So I've done both all wholemeal and all plain. I recommend just using whatever you have providing, of course, it isn't self raising.
I generally work on the principle that 2 cups of flour will make 3 roti in my untrained hands.
Other Stuff
- Water, (self explanatory) keep in a cup by your mixing bowl
- a pan, a tawa is traditional but a frying pan is good enough
- oil, I tend not to use oil now as it means I end up with one oily roti but you know your own pans best and know if they need the oil or not.
- a device for flipping, fish slice, spatula, etc.
- a flame (optional)
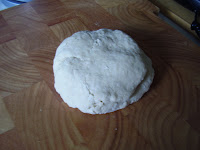 Get your flour in a bowl and make a well. Seriously make a well, it is so much easier to clean the bowl if you have added the water in a well. Add the water a bit at a time. It is impossible for me to tell you just how much you need. Just keep on adding a bit at a time and mixing it well until most of the flour has come together and you have a good ball of dough.
 Pull it out of the bowl now and pop it down on your floured work surface. We're going to separate the big ball of dough into roti sized ones. Just break a handful off at time and work into balls.


- Now we roll it out. You will notice that roti are supposed to be circular. I managed a circleonce, I have no need to prove that I can do it again. Just roll them out thin and vaguely round.
- Now bring it to the frying pan. Put it on medium hot and wait for it to heat up. Wait for it, go! Toss the roti on the pan. Toss it over when brown circles start to form on the bottom. When both sides have brown circles on them the roti is pretty much done. Now you have two option, if you are working on electric leave the roti in the pan and as it starts to puff up a bit of downwards pressure from your spatula will make it even. Then you are done.
 Or, if you have a gas hob you can hold it in the flame, moving it around until it puffs up. If you are feeling la zy you could just lay it across the top of the hob (the bit you rest your pan on) and flip it over as it starts to catch fire. If you can I really recommend putting it over the open flame as it makes a lovely crisp roti.

You may not want to eat your roti right away. If you are waiting for the rest of the meal to be cooked leave it in the oven to keep warm. If keeping them for a few days wrap them up in tinfoil and keep like any other bread. It can be popped in the pan to reheat for a couple of seconds or eaten cold.
No comments:
Post a Comment